Zipping or Unzipping a File in the Virtual Lab
This article will walk you through how to use 7-Zip in the Virtual Lab.
When you download a folder or a large file in the Virtual Lab, that file or folder will usually be in a "zipped" format, which helps save space. Zipped files are unable to be uploaded into Canvas or used in applications like openLCA, Eclipse, etc. The Virtual Lab contains an application called 7-Zip, which allows for easy zipping or unzipping of files.
How to Unzip Files
- In the Virtual Lab, after you download a zipped file, find the file in your Downloads folder.
- Right-click the .zip file, and hover your mouse over the 7-Zip option.
- Select "Extract Files."

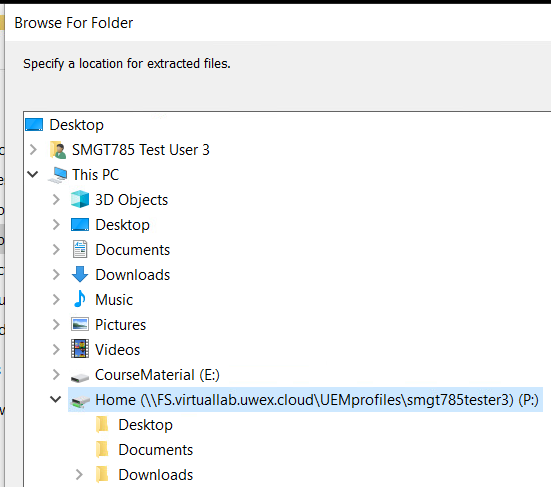
- In the new window, click the ellipsis to select where you would like the unzipped file to appear.

- Choose the location for the file to be placed, then click "OK" in that window.
- Click "OK" in the original window.
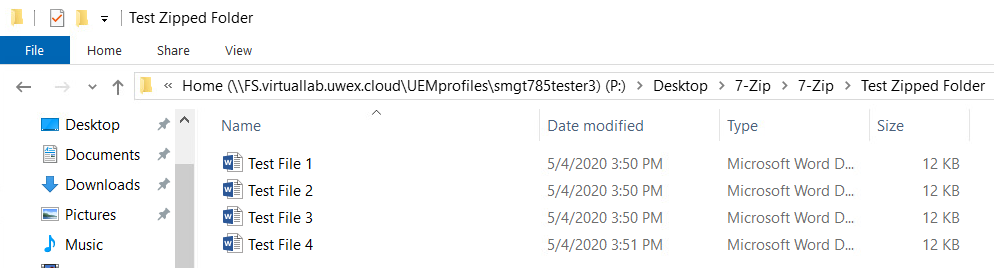
- The process will run, then you should be able to open the file viewer to find your file where you placed it.
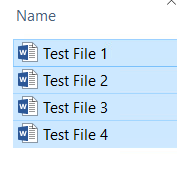
- Double-click to open it, and you should see your files.
How to Zip Files
- In the Virtual Lab, find the files you would like to zip together.
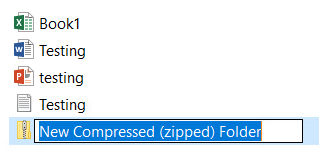
- Right-click where you want the folder, then hover your mouse over "New"
- Click "Compressed (zipped) Folder."

- Name your new folder.
- Select your files and drag them to the new zipped folder.